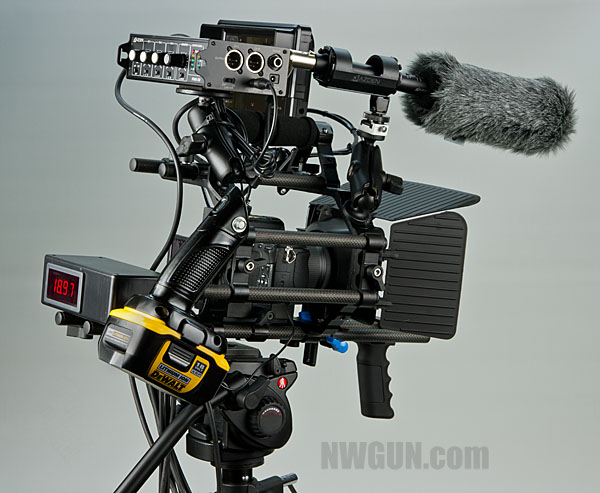
Dewalt battery powered DSLR camera rig - Image copyright 2012 NWGUN.com
I am a “systems guy” – I tend to like components that work well together, and also offer economy and compatibility at the same time. When I decided to upgrade my 14 year old 14.4 volt Dewalt drill driver, I was looking for a good “system” to buy into. I wanted drills, a reciprocating saw, a light, a circular saw, and other accessories that would all work together and use the same batteries and charger. I also knew that I wanted a jobsite radio with iPod compatible aux input, and a small battery powered shop vac to complete the ensemble.
After much looking and reading reviews, I plopped down the cash on a refurbished 4-piece Dewalt 18V XRP kit. I also picked up the shop vac that has turned out to be indispensable for spot cleaning our RV, cars, the reloading bench, guns for photo shoots (gotta get rid of that dust and lint!), and every home improvement job that I’ve performed recently. for Christmas, my wife got me the jobsite radio that charges and runs off the Dewalt batteries, has 3 110VAC outlets on the side, and features the all important aux input jack for my iPhone! I absolutely love this system!
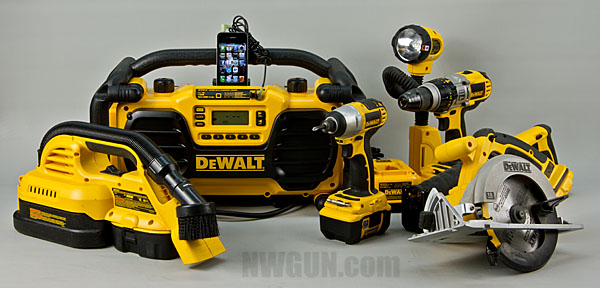
My Dewalt 18V powered tools - a great "system" - Image copyright 2012 NWGUN.com
Recently, I decided to upgrade my current video camera (Canon EOS 7D) so that I could extend my capabilities, increase the quality of my video, and streamline my workflow both on the set and in post production. I first looked at getting a pro HDV camera (~$3000.-5000). But after taking inventory of all of the accessories that I would want to “bolt on”, I decided to go the DSLR route again, but this time to go with the only true hybrid DSLR out there, the Panasonic LUMIX GH2. What’s unique about this camera is the fact that it has continuous autofocus, manual audio level control, face tracking or object tracking autofocus, and extremely good image quality. With this camera, video is rendered with a video codec (AVCHD) that’s both compact (file size) and easy to work with.
At this point, I embarked towards one of the truly memorable mega-DIY projects that’s still underway. At the core of this system is the camera, and the rail/cage system that serves as the “frame” by which all other components are attached.
Here’s the components that make up this system:
- Panasonic LUMIX GH-2 HDSLR camera (Micro 4/3 system)
- Cage and rail system featuring 6 carbon fiber rods, and dual aluminum C brackets, handle
- Lilliput 7″ HDMI monitor
- Azden FMX-32 3-channel field mixer
- Azden SGM-1X XLR Shotgun Microphone
- Barska pistol grips (2)
- Mattebox with quick release
I knew that I didn’t want to have to run individual batteries in each of the components, so I hooked up AC adapters to the rig, and put a power “octupus” on the frame running power to each of the powered components. This worked OK, but there were two big issues. First, the power cables and adapters were very ugly and unwieldy, and I also had an AC related hum in my audio.
Why don’t I just run the whole thing off one big battery I thought? No power cords, no AC adpters, and no buzzing sound. Hmmmm….. I started looking at battery solutions for indie camera rigs and broadcast equipment, but the price was a bit out of reach ($500.-$1000.-ish).
BAM! It hit me: what about making this camera rig another part of the Dewalt “system” that I had just bought into. I already had Lithium Ion batteries and chargers- this could be a great way to power the camera I thought to myself.
In my head, I envisioned plugging Dewalt batteries into the camera set like you slap a battery onto your drill driver. I also pictured a digital display that would show you the main battery voltage. This could be cool!
So I went about researching all of the components that I would need: plugs, cables, DC-DC voltage converters, The voltage meter, the enclosure, etc. When I had scavenged all of the required gear, I rolled up my sleeves, powered up the soldering iron, got out the Dremel moto tool, and went to work. In the following video you can see the result.
It worked! In order to integrate the Dewalt battery system I ordered in inexpensive ($23.00) Dewalt 18V flashlight, and proceeded to dismantle, paint, and modify it so that it would attach to the camera rig via standard 15mm clamp that works with the rail system. I can remove/replace or move around the battery grip very quickly thanks to this modular system.
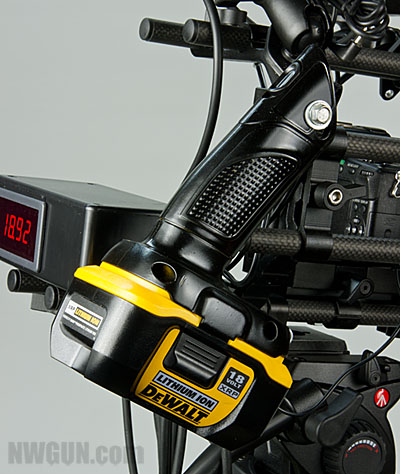
The power source for this industrial-strength camera rig - Dewalt 18V XRP battery packs - Image copyright 2012 NWGUN.com
The carbon fiber rods are both cool looking and quite practical as well. These rods are stiff, strong, and extremely light weight. The clamps move freely when lose, and are rock solid when engaged. With this kind of modular approach implemented, I can’t help but compare this kind of camera rig to the AR-15 rifle platform. Abundant accessories, limitless configurations, it’s a good “system”. 🙂
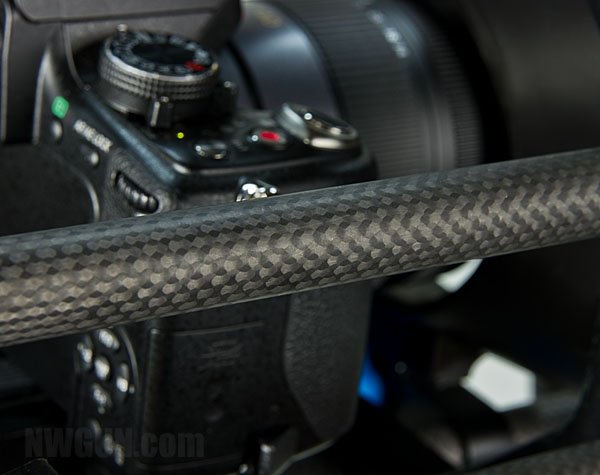
It looks cool, and it's practical - carbon fiber rods make up the frame for this cage - Image copyright 2012 NWGUN.com
One of the things that most people don’t realize is that quality video is really 50% about picture, and 50% about good audio. One of the exciting new features that this rig includes is a quality “shotgun” microphone. This type of microphone is directional, and can pick up good clean sound in a variety of operating environments. Plus, the fact that it’s called a “shotgun microphone” is cool in itself. With the 3-channel field mixer, I can use the shotgun microphone, and a couple lavalier microphones (best for clean voice recording) all at the same time if needed! This is really going to be a game changer. If you are using your shotgun microphone outdoors, one thing you really need is a good “dead cat” 🙂 A dead cat is a fake fur cover for the microphone that helps cut wind noise.
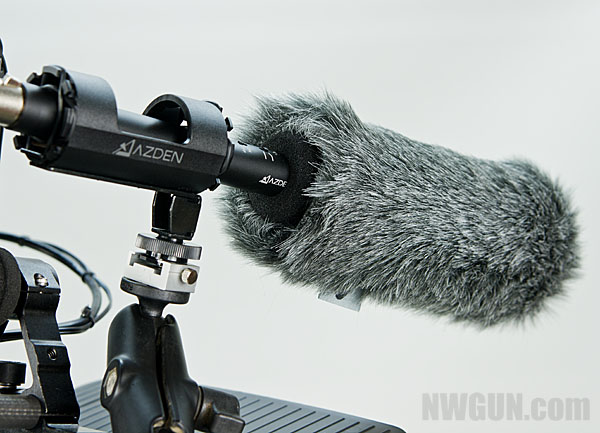
The "Dead Cat" - important for cutting wind noise - Image copyright 2012 NWGUN.com
One of the other important components in this rig is the 7″ field monitor. Because of the amazing RAM mount system I’m using, the monitor (As well as the field mixer and shotgun mic) can be quickly moved and pivoted. If I want to see how the shot is composed, I can do so from either in front of the camera, or behind the camera. The camera operator can also use the monitor to adjust/check exposure and focus. It’s an important part of the system!
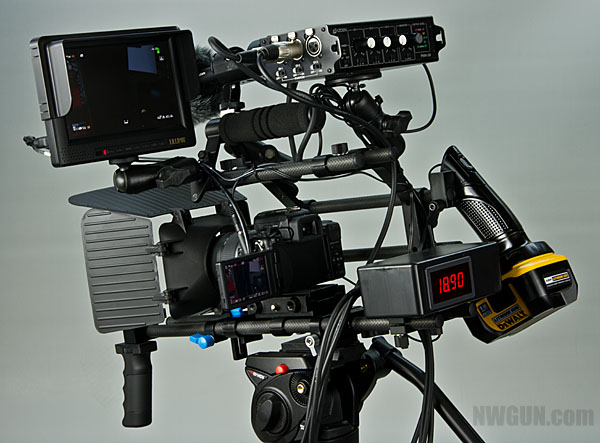
A fully modular system - the "AR" platform for cameras - Image copyright 2012 NWGUN.com
I’m really looking forward to using this camera to shoot both high quality online videos for http://nwgun.wpengine.com and http://ultimatereloader.com, and also shooting video for studio DVD productions. It’s going to be a lot of fun. Stay tuned!
Thanks,
Gavin

Recommended video editing software?
Dan- what are you editing for, and what’s your budget? That will help me give you some suggestions!
Gavin are you going to take any orders for these?
I understand the approach, a rig to do EVERYTHING, but IMHO it looks terribly complicated and heavy. My personal approach is to have multiple rigs (the approach favored by Shane Hurlbut) depending on the shot (handheld, shoulder, or tripod), trying to find the simplest lightest solution to each condition. Of course it´s what works for me, If this rig suits your shooting style, power to you!
I am looking into using the Tekkeon MP-3450 battery to power various elements of my rig. While you can run a 5v USB and a variable voltage tap simultaneously, that limits the capabilities a bit for using on a DSLR rig. Like yourself, I had looked into the standard battery setups (V-Mount, Anton Bauer Gold, etc) but the price for batteries and chargers are ridiculous.
The standard V-Mount and Anton Bauer battery setups typically have a power distribution box either mounted directly below the battery, or connected to a separate part of the rig. I see you have your own power distribution box w/ the LCD voltage display. Do you have any information on constructing one of these? I need to know how I can take the Tekkeon MP-3450 and use it with such a distribution box. Does the power run at the highest voltage from the battery, and then get dispersed accordingly within the distro box? Thanks!